

On this page
The first crawl space I ever inspected looked fine from the hatch. Dry-ish dirt, a little musty, nothing dramatic. Then I shined a light on the floor joists and saw the underside of the subfloor freckled with black spots. The homeowner had been running a fan down there for two summers, convinced airflow would dry it out. It was doing the opposite.
That gap between what looks reasonable and what actually works is why crawl space moisture control trips up so many people. The space under your house behaves nothing like the basement, and the fixes are different too.
Why a crawl space stays wet when a basement might not
A basement usually has poured concrete walls and a slab floor. A traditional crawl space often has bare dirt, or a thin plastic sheet thrown loosely over dirt, sitting 18 to 36 inches below the joists.
That soil is a moisture engine. Ground evaporation can push several gallons of water vapor per day up into the space, and it never really stops. This is a completely separate path from the leaks and grading problems you deal with in Damp Basement Causes and Fixes.
Then there are the vents. Older code required foundation vents on the theory that outside air would carry moisture away. In a hot, humid climate that logic backfires.
Warm summer air holds a lot of water. When it drifts into a cool crawl space and hits the ductwork or the framing, it condenses, and you have added moisture instead of removing it.
Get the space ready before you seal anything

Skipping this step is the mistake I see most. People roll out a nice new liner over standing water and wet debris, then wonder why it smells worse in a month.
Before you start, plan a dry-out window of a few days and pick up a headlamp, knee pads, a utility knife, and heavy gloves. Crawl work is miserable, so set yourself up once.
- Clear out old vapor barrier, construction scraps, and any wood debris on the ground.
- Find and fix active water first: downspouts dumping at the foundation, a plumbing drip, a French drain that failed.
- Check for standing water and add a sump pump if the ground stays wet after rain.
- Look up at the joists with a flashlight and note any existing mold or soft, damp wood.
- Confirm your dryer vent actually exits the crawl space and does not dump warm, wet air under the house.
If you see heavy mold on the framing or smell a strong, sour odor, get a professional assessment before you encapsulate. Sealing moldy wood inside a fresh liner traps the problem where you cannot see it.
Step 1: Lay a real vapor barrier
The vapor barrier is the single most important piece, and it is where cheap jobs cut corners. A contractor-grade liner runs 6 to 20 mil thick. The flimsy 3 mil painter’s plastic some crews use will tear the first time someone crawls across it.
Cover 100 percent of the soil. Overlap seams by at least 12 inches and seal them with the manufacturer’s tape, not duct tape, which lets go within a year.
Run the liner a few inches up the foundation walls and mechanically fasten it there. This is the difference between a vapor barrier and true encapsulation, which I will get to next.
If bare dirt is showing anywhere, moisture is getting in. Full soil coverage with sealed seams is not optional, it is the whole point.
Step 2: Decide whether to encapsulate
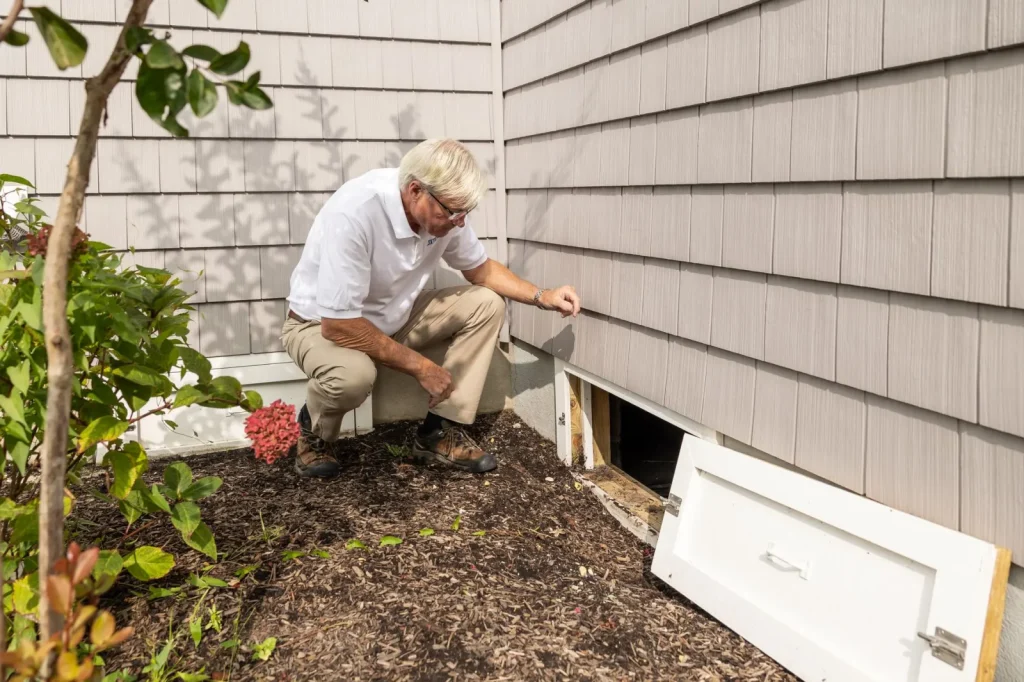
Encapsulation takes the vapor barrier idea and finishes the job. You seal the soil, the walls, and often the vents and rim joists, turning the crawl space into a conditioned zone that is part of your home’s envelope.
What a full encapsulation includes
- A thick liner across the floor and up the walls, sealed at every seam.
- Sealed or foam-blocked foundation vents so humid outside air stops entering.
- Insulation on the rim joists and sometimes the walls.
- A drainage plan, meaning a sump pit if water ever collects.
The U.S. Department of Energy backs sealed, unvented crawl spaces in most climates, and you can read their reasoning on the Energy Saver pages. A sealed crawl space also tends to lower energy bills, because your floors stop pulling heat and humidity from the ground.
When a plain vapor barrier is enough
In a genuinely dry climate with good drainage and no history of dampness, a well-sealed vapor barrier alone may hold the line. If your crawl space has been bone dry for years and the wood reads low on a moisture meter, you may not need the full build. Most humid regions, though, end up wanting encapsulation.
Step 3: Add a dedicated dehumidifier
Here is the part homeowners resist, and it is what separates a crawl space that stays at 55 percent relative humidity from one that creeps back to 70. Sealing the space slows moisture down. It does not remove the vapor already in the air or the small amount that still finds its way in.
A dedicated crawl space dehumidifier does. These are low-profile units built to sit or hang in tight spaces and drain continuously to your sump or to the outside, so you never haul a bucket.
Do not drop a $200 big-box portable in the crawl space and call it done. Standard units are rated for warm rooms and struggle in the cooler air down there. A purpose-built crawl unit is designed for the temperature range and runs for years.
Sizing matters. A typical 1,200 to 1,600 square foot crawl space is well served by a unit rated around 70 to 90 pints per day, though a sealed space needs less capacity than an open one. If you want the full logic behind capacity, the ideas in How to Size a Dehumidifier by Pints carry over directly. For the machine type, the reasoning in Desiccant vs Compressor Dehumidifier Compared applies too, since compressor units lose efficiency in a cold crawl space.
| Approach | What it does | Typical cost |
|---|---|---|
| Vapor barrier only | Blocks soil moisture, no wall or vent work | $1,500 – $3,000 |
| Full encapsulation | Seals soil, walls, vents, plus insulation | $3,000 – $8,000 |
| Crawl space dehumidifier | Holds RH at target after sealing | $1,000 – $2,500 installed |
Prices swing with square footage, ceiling height, standing water, and local labor. A small dry crawl with a DIY liner can land near the bottom. A big wet one with encapsulation and a dehumidifier runs toward the top.
Step 4: Set your target and check on it
Once the space is sealed and the dehumidifier is running, aim to hold relative humidity between 50 and 55 percent. That range keeps the wood dry and stays below the point where mold gets comfortable, which the EPA discusses on its mold and moisture pages. The same 60 percent ceiling from Best Humidity Level to Prevent Mold applies under the house.
Drop a $15 hygrometer in the crawl space and glance at it monthly. If numbers climb after a heavy rain and stay high, you have a drainage issue the barrier cannot fix on its own.
Putting it into practice
Start by getting under the house with a light and being honest about what you find. Standing water and active leaks come first, always, because no liner survives a foundation that keeps flooding.
From there the order is simple: seal the soil with a proper vapor barrier, encapsulate if you live anywhere humid, and add a dedicated dehumidifier to hold the number where you want it. That trio is what turned my freckled-joist project around. Six months after we sealed and set a crawl unit, the moisture meter read low and the musty smell upstairs was gone. Do those three things in that order and the space under your house stops working against you.
Frequently asked questions
Do I really need a dehumidifier if I encapsulate the crawl space?
In most humid climates, yes. Encapsulation slows moisture but does not pull existing vapor out of the air, and a little always sneaks in. A dedicated crawl unit holds relative humidity around 50 to 55 percent so wood stays dry. In a genuinely arid climate with a bone-dry space, a sealed vapor barrier alone may hold, but check with a hygrometer first.
Should crawl space vents be open or closed?
In hot, humid regions, closed. The old idea that vents dry a crawl space backfires in summer, when warm outside air enters and condenses on cool framing and ductwork, adding water. Sealing the vents as part of encapsulation is standard practice now. In a very dry climate the calculus can differ, so match the choice to your local humidity.
How thick should a crawl space vapor barrier be?
For a durable job, use a liner rated 6 to 20 mil. Thin 3 mil painter's plastic tears the moment someone crawls across it and fails within a year or two. Overlap seams by at least 12 inches and seal them with the manufacturer's seam tape rather than duct tape, which loses its grip fast in a damp environment.
What does crawl space moisture control usually cost?
A vapor barrier only job runs about $1,500 to $3,000. Full encapsulation with wall and vent sealing plus insulation typically lands between $3,000 and $8,000. A dedicated crawl space dehumidifier adds roughly $1,000 to $2,500 installed. Standing water, square footage, and local labor rates move these numbers, so get a couple of quotes.
Can I do crawl space encapsulation myself?
A handy homeowner can lay a vapor barrier and seal seams in a dry, accessible crawl space over a weekend. Full encapsulation with wall insulation, vent sealing, and a drainage plan is harder, and any sign of heavy mold or standing water is a reason to bring in a pro. Sealing a moldy or actively wet space just hides a problem you will pay more to fix later.

Dharm Solanki
Dharm Solanki spends a lot of time thinking about the air inside people's homes, usually when no one else is. He writes about humidity, ventilation, and dehumidifiers, along with the small fixes that turn a stuffy or damp room into one that feels comfortable again. He would rather explain why a recommendation works than just point at a product, so his guides tend to answer the question you were about to ask next. And if something looks great on paper but struggles in a normal house, he says so.